
Falling for a fresh coat of paint and pretty furniture is easy. We get it, but here’s what the data actually says: 86% of standard home inspections turn up at least one real issue that needs repairs.
And nearly half of all buyers (46% to be exact) use those findings to knock money off the sale price. From our experience, that’s the difference between a smart purchase and a costly mistake.
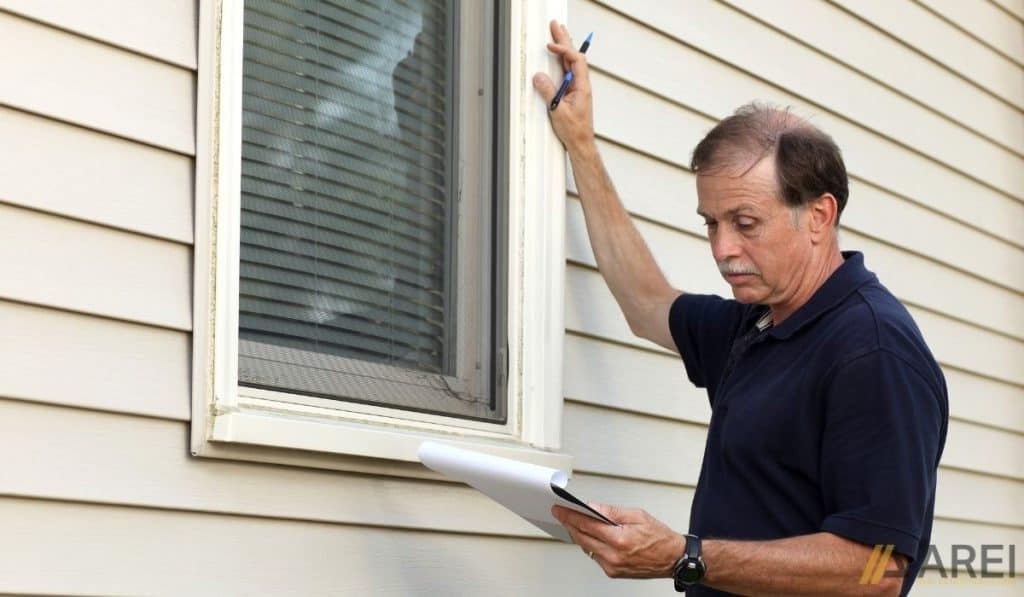
That’s why you need a solid home inspection checklist in Richmond, VA before you ever sign closing papers. This guide walks you through the entire homebuying process so you can spot trouble early, protect your property, and give buyers real peace of mind.
Think of it as your trusted walk through a potential dream home.
We recently covered our probate checklist for unique sales. Next up, we’ll answer “How long can someone leave their belongings on your property?” for tricky possession dates. And for the full start-to-finish guide, check our main home buying checklist post.
For now, let’s focus on what a sharp set of eyes can catch before closing day.
Short Summary
- Start your home inspection checklist with the exterior and foundation. Water damage and cracks tell big stories.
- Walk through each room looking for water marks, mold, and stuck windows or doors. Those point to settling or moisture.
- Test every sink, tub, toilet, and stove. Confirm hot and cold water flow. Check for leaks and rust under fixtures.
- Audit major systems like HVAC and electrical. Ensure carbon monoxide detectors and GFCI outlets are present and working.
- In Virginia, a standard home inspector cannot certify a septic system. Hire a separate licensed pro for that inspection.
- Use the full report with your real estate agent to negotiate repairs or a lower sale price. Do not be afraid to walk away.
#1 — Inspect the Exterior, Foundation, and Structural Integrity
The outside of a house tells real stories. Expensive stories. Before you step through the front door, you need to inspect the exterior with a critical eye. The foundation and overall structure don’t lie. Here’s what we look for every single time.

Start With the Grading and Ground
Water is a house’s worst enemy. The yard should slope away from the foundation, not toward it.
Watch for these red flags:
- Sinking soil near corners of the home
- Standing water after rain
- Erosion channels near downspouts
- Concrete slabs pulling away from the house
Take this example. A backyard patio may look level at first glance, yet soft soil underneath can signal years of hidden runoff. So ask yourself: does rainwater drain toward the neighbors or toward the front porch?
Read the Foundation Walls
Cracks happen. Hairline cracks in a concrete slab are normal. But horizontal cracks or stair-step patterns along block walls? That points to serious settling.
Run your hand along the foundation (carefully, no gloves needed). Look for bowing or bulges. A structural engineer once told us, “Most buyers panic over nothing, but they ignore the one crack that matters.” Take a flashlight. Get low. Document every crack with a photo.
Check the Roof and Siding
Now look up. The roof should have no missing shingles or sagging lines. Scan for holes from past storms or critters. Check the siding for rotting wood or bubbling paint. Those are classic signs of water damage sneaking in from behind.
Here are several areas worth extra attention:
- Soft wood around windows or gutters
- Loose flashing near vents
- Dark streaks beneath roof valleys
- Visible holes in siding or soffits
- Sections with missing caulk or warped panels
A location near large trees means more debris on the roof and more wear. Bring binoculars or use your phone zoom. One missing shingle might be nothing. Five missing shingles means call a roofer before you make an offer.
#2 — Evaluate Internal Rooms, Windows, and Living Spaces
Now we go inside. Grab a notebook. You want to separate cosmetic flaws from real problems. Walk through each room like a detective, not a guest. The house will show you evidence if you know where to look.
Walls, Ceilings, and Flooring
Walls that bow or bulge are red flags. Fresh paint in one corner only? That’s suspicious. Water marks on ceilings often mean a past leak from the attic or upstairs bath.
Push on the drywall gently. Does it feel spongy? That suggests old water damage behind the surface.
A few practical checkpoints help:
- Floors should feel level underfoot
- Ceiling stains deserve follow-up questions
- Soft laminate near sinks may signal old leaks
- Cracked tile sometimes reflects subfloor movement
A recently painted ceiling beneath an upstairs bathroom may look spotless, yet faint discoloration under bright lights can reveal past trouble.
Windows and Doors
Doors should latch securely without extra effort. A door that sticks at the top corner can mean the house is shifting. Windows need to open and close without force. A stuck window hints at structural movement. Test every single one. Not just the pretty ones in front.
The bedroom windows on the north side matter too. Ask a funny question: Would a firefighter get out through that window in an emergency? If the answer is no, that’s a problem.
Moisture and Mold Scans
Moisture hides where you least expect it. Head to the attic first. Bring a mask if dust bothers you. Sniff for musty odors. Look for dark spots on wood. Then check the basement or crawlspace.
Peek near the fireplace chimney for mold growth or white efflorescence (that chalky powder). Mold loves dark, damp corners. Turn on the lights in every closet. Shine a flashlight behind the water heater.
Look for these warning signs:
- Musty odors
- Peeling trim
- Dark staining near vents
- Visible mold growth
- Damp insulation
For instance, a basement may smell clean during a winter showing, yet hidden humidity behind storage shelves can still cause problems later.
#3 — Assess Plumbing, Sinks, and Major Appliances
Water should flow where you want it. Then it should disappear. Test everything like you plan to live there tomorrow. The plumbing system is the house’s circulatory system. A small leaks today becomes a big repair next year.
Fixtures and Supply Lines
Turn on every sink. Both handles. You want steady pressure from hot and cold water. Let the tub fill halfway. Does the showerhead spray evenly? We ran a test on a cute bungalow last year. The sinks looked fine. But the master tub took four minutes to get warm water.
The hot water heater was undersized and failing. Run the dishwasher and the kitchen sink at the same time. Notice a drop in pressure? That points to old galvanized pipes.
Waste and Drainage Lines
Flush the toilets. Do it twice. Watch the water swirl and listen for gurgling sounds from other drains. Gurgling means poor venting or a partial clog. Get on your hands and knees (yes, really) and look under every sink and behind the toilet.
Shine a light for leakage, rust, or wet spots. A little rust on a supply line nut might be nothing. A puddle of water means calling a plumber.
Pay attention to these details:
- Slow pressure recovery
- Pipe vibration sounds
- Cloudy water
- Loose fixture handles
- Weak spray patterns
As an example, sputtering water during startup sometimes points toward aging supply lines or trapped air inside the system.

Kitchen Appliance Safety
Built-in appliances count as part of the sale. Turn on the stove burners. Does each one ignite? Set the oven to 350 degrees and wait ten minutes. Open the vent hood. Does it pull air?
Start the dishwasher on a short cycle. Listen for weird grinding noises. The defects we catch most often: stove elements that don’t heat, dishwashers that leak from the bottom seal, and operational failures in garbage disposals.
A stove that looks new but won’t hold temperature is not operational. That’s a negotiation point. Make a list and take videos. Your inspector will write a full report, but your own eyes add valuable backup.
#4 — Audit Major Systems and Electrical Safety Concerns
The guts of the house matter most. We’re talking about major systems that keep you warm, cool, and safe. Replacing these items costs thousands. So let’s poke around with purpose.
HVAC, Heating, and Cooling
Find the furnace and air conditioner. Note the age on their data plates (usually near the serial number). A cooling system for the past 15 years is on borrowed time. Turn the thermostat to heat. Feel every vent. Does airflow feel adequate in the farthest bedroom?
A few smart checks include:
- Uneven room temperatures
- Loud startup noises
- Rust near drain pans
- Dirty filters
- Weak return airflow
Suppose the upstairs feels muggy while the lower floor stays cold. That imbalance often signals airflow restriction or duct leakage (a pretty common headache in older homes).
Electrical Infrastructure
Grab a cheap circuit tester from any hardware store ($10 or less). Plug it into outlets throughout the house. Look for electrical outlets that read “open ground” or “reverse polarity.”
That’s trouble. Kitchens and bathrooms require GFCI electrical outlets. Those are the ones with the test and reset buttons. Push the test button. Does the power cut out? Good. Now press reset.
Watch for these warning signs:
- Warm outlet covers
- Flickering lights
- Buzzing breaker panels
- Loose switches
- Double-tapped breakers
Red Adair once said, “If you think hiring a professional is expensive, wait until you hire an amateur.” Fair advice when wiring issues appear.
Essential Safety Devices
Smoke alarms need to exist. More than that, they need to talk to each other. In newer homes, if one alarm goes off, they all should sound.
Press the test button on each one. Carbon monoxide detectors are required near sleeping areas in most states. Push their test button too. A wise fire chief once said, “Dead batteries kill more people than fires do.” Safety concerns around carbon monoxide detectors are no joke.
A practical walkthrough should confirm:
- Alarm placement on each level
- Fresh batteries
- Clear test signals
- Expiration dates
- Adequate detector coverage
Virginia Rules: Smoke Alarms and Septic Systems
Two local rules you can’t skip. First, smoke alarms. Under current VREB and DPOR standards, a Virginia home inspection contract can’t exclude the visual check of smoke alarms. Your inspector must look at them.
Second, septic systems. A standard home inspector cannot certify an onsite sewage system. You need a separate licensed septic pro. That person must inspect all openable parts and hand you a written report.
Before publication or contract use, confirm current HB1178 requirements, reporting timelines, and effective dates directly through the Virginia Department of Professional and Occupational Regulation (DPOR) or the Virginia Legislative Information System.
#5 — Leverage Your Home Inspections to Negotiate and Deal With Red Flags
The inspection report lands in your inbox. Now what? Don’t panic. This paper is power. You hired an expert. Now you and your real estate agent turn findings into action.
Review the Inspector’s Findings
Sit down with your real estate agent. Read the full report page by page. Separate cosmetic blemishes from structural trouble. A loose doorknob? That’s nothing. A cracked foundation beam? That’s everything.
A helpful review usually separates:
- Minor touch-up repairs
- Aging components
- Active moisture intrusion
- Structural movement
- Immediate safety hazards
Take this example. Scuffed flooring rarely changes a purchase decision. Extensive attic mold usually changes the entire conversation.
Ask your agent: “Which three items would you lose sleep over?”

Build Your Action Plan
You have two main paths. First, ask sellers to fix the big stuff before closing. Second, negotiate a lower sale price and handle repairs yourself. Which is better? It depends on the deal.
Some sellers have no cash for repairs. Others will say yes to anything just to close. We prefer asking for a credit at closing. That puts money in your pocket. Then you hire your own contractors.
Here are several common negotiation points:
- Roof replacement credits
- Plumbing repairs
- HVAC servicing
- Electrical corrections
- Foundation evaluations
A practical question helps here: would these issues still feel manageable six months after move-in?
Also, never let the seller pick the cheapest handyman for a roof repair. That rarely ends well.
Walk Away or Move Forward
Here’s where courage matters. An inspection contingency isn’t the same as a financing appraisal. The contingency lets you cancel for any trouble found in the report. The appraisal only cares about bank value. So don’t be afraid to walk.
A bad foundation or active mold? Walk away. A ten-year-old water heater? That’s normal.
If you’re afraid of losing your earnest money, read your contract. A solid inspection contingency gives you an exit ramp. Use it when you need it.
For instance, one unstable retaining wall can create years of drainage expenses. Smart buyers negotiate carefully, ask direct questions, and stay focused on long-term costs instead of emotional pressure.
Final Thoughts
Let’s wrap this up. Here are your key takeaways:
- Start outside. The house foundation and roof come first.
- Never skip the major systems. HVAC and electrical need a hard look.
- In Virginia, hire a separate septic pro. Your home inspector cannot do that job.
- Use the full report to negotiate. Do not be afraid to walk away.
A clear-eyed inspection brings peace of mind. You want a house in good condition before you sign. That is the whole goal.
We are AREI Properties, your local Richmond resource. Call us at (540) 993-3209 or visit our homepage for more guides like this one. No pressure. Just help when you need it.


